

Configure Project level self serve workflows
Background
Direct Costs tool enables Procore administrators to build, automate and manage tailored review processes. Implementing reusable templates and automated self-serve workflows across your projects accelerates the direct cost approval process and significantly reduces manual effort.
Things to Consider
-
Required User Permissions:
-
To view, create or edit a custom workflow at the Company level:
-
'Admin' level permissions on the Company level Workflows tool.
OR -
'Read Only' or 'Standard' level permission on the Company level Workflows tool with the 'View custom workflows' and 'Create and edit workflow templates' granular permission enabled on your permission template.
-
-
'Read Only', 'Standard' or 'admin' level permission on the project's direct cost tool.
-
Prerequisites
Steps
Set up direct cost self-serve workflows at the Project level
-
Create a workflow template. To learn more, see Create a workflow template.
-
Assign workflow templates to projects. To learn more, see Assign workflow template to projects.
-
Navigate to the Company level direct cost tool where the workflow is being configured.
-
Click the Configure setting icon.
-
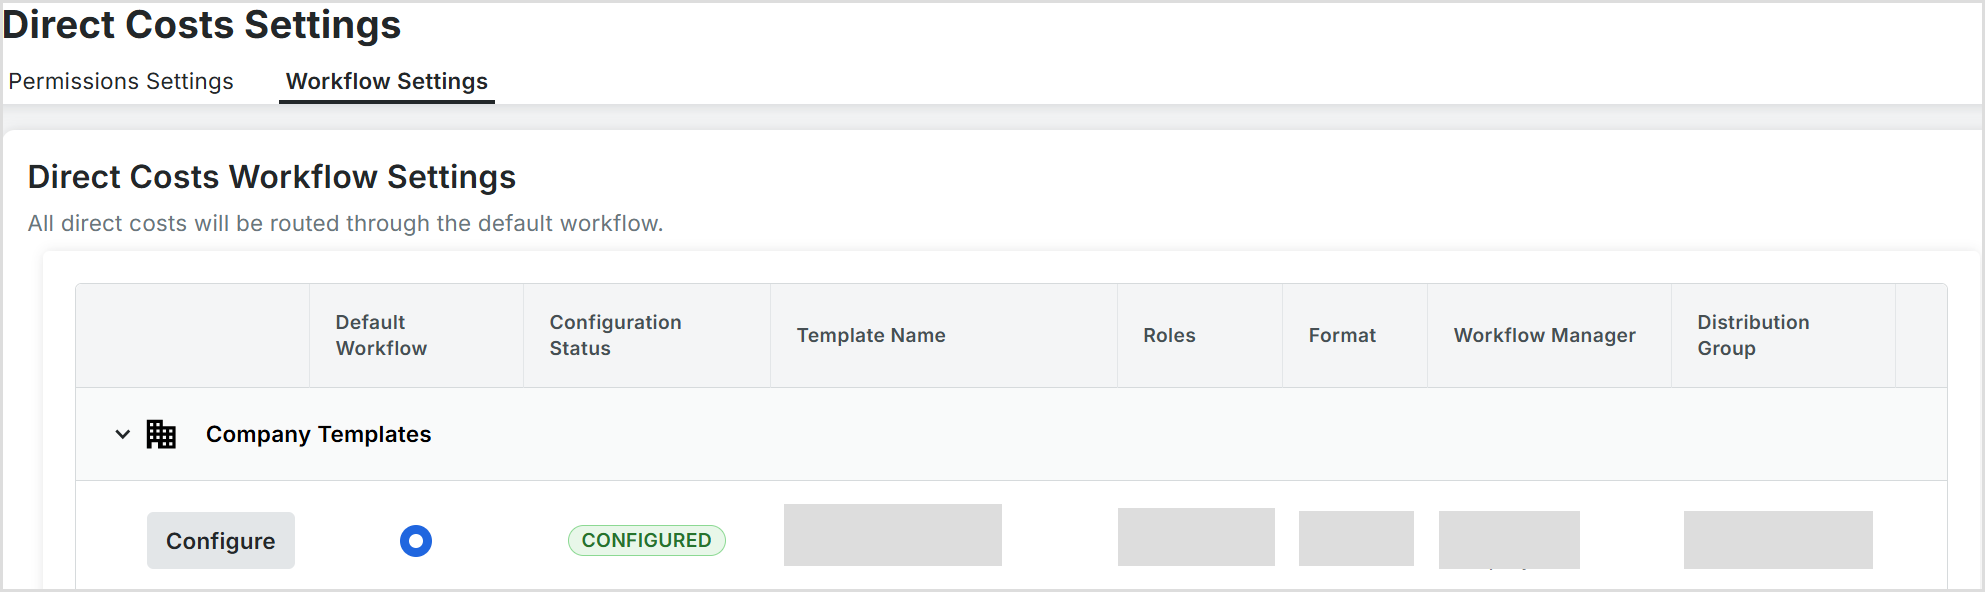
Click the workflow settings.
-
Click Configure next to the workflow being configured to open the workflow viewer.
-
At the top of the workflow viewer, assign a workflow manager by selecting a project user from the drop-down list.
Note: optional step. Complete based on workflow requirements. Assign distribution group. Select a distribution group from this list. These are the groups of users who will receive notification emails from Procore when certain actions occur in a workflow. -
Click Save.
Update the Initial Standard Step in the Custom Workflow
-
In the workflow builder, do one of the following to name your initial workflow step:
-
Click the pencil icon and then type over the 'Untitled' step title in the right pane. Then press the RETURN key.
-
Click into the text box and type over the 'Untitled' step in the right pane. Then press the RETURN key.
-
-
In the workflow step, update the 'Step details' section:
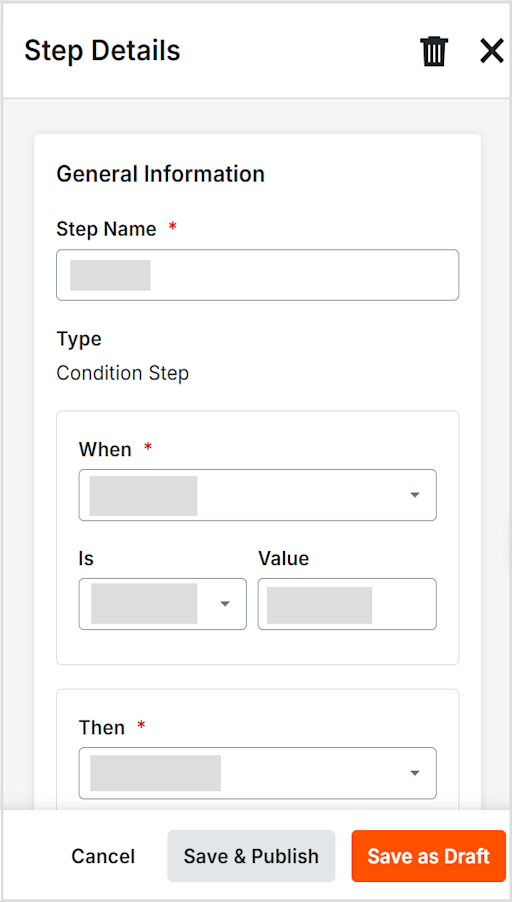
Note: An asterisk (*) indicates a required field.
Step details & configuration
-
Step name: The designated title defining this particular step in the overall workflow sequence.
-
Type (condition step): Defines the operational logic for the step, specifying whether it performs an action, calculates a value or evaluates a conditional rule.
-
When: Identifies the main attribute or trigger condition that starts the evaluation. For example: Total cost, Department, vendor.
-
Is: The comparison operator used to test the condition, such as Equal to, Greater than or Contains.
-
Value: The target threshold, numerical value or text criteria checked against the When selection to satisfy the rule.
-
Then: The designated action or result triggered if the condition is met. For example: Require manager approval, Apply overhead fee.
Actions
-
Cancel: Closes setup and discards unsaved changes.
-
Save & publish: Verifies, saves and immediately deploys the rule to the active direct cost environment.
-
Save as draft: Saves your work as an inactive draft so you can edit it later.
Respond to a workflow
-
Navigate to the project's direct cost tool.
-
Assigned reviewers will receive task in their My Open item Dashboard.
-
Click Edit to open the pending item to view the direct cost details.
-
Click Show workflow.
-
Click Respond and select Approve or the appropriate action to advance or finalise the workflow.
-
Click Submit.