Compare Projects in Portfolio Financials and Capital Planning
Note
The information in this tutorial applies to accounts with the Portfolio Financials product in Procore. Reach out to your Procore point of contact for more information.Objective
To compare projects using the Project Comparison feature in Portfolio Financials and Capital Planning.
Background
The Project Comparison tool allows you to compare past and current project costs side by side. By viewing past project information, you can make more informed budgeting decisions for future projects.
Things to Consider
- Required User Permissions:
- 'Full Access' to the project or higher.
Note: Users with 'Full Access' can only compare the projects they have access to.
- 'Full Access' to the project or higher.
Steps
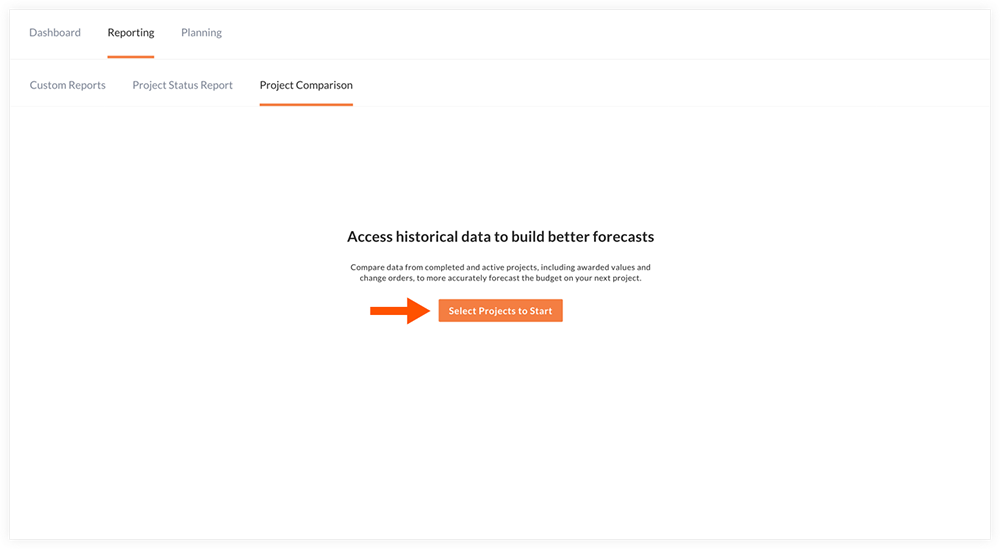
- From the Dashboard, click the Reporting tab.
- Click the Project Comparison tab.
- Click Select Projects to Start.
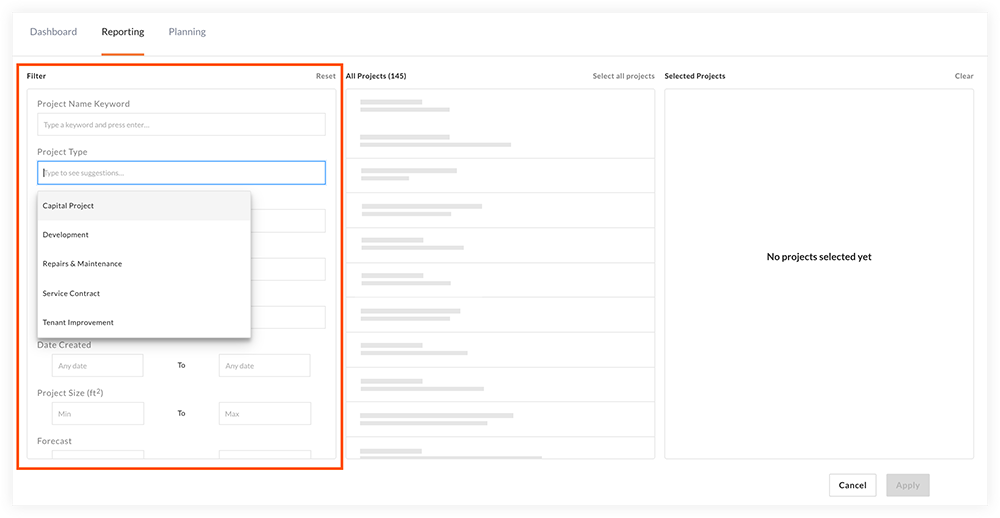
- Use filters to narrow focus to a given market, building or project keyword.
- Click on a project to add it to the Selected Projects column.
Tip! Select previous and current projects that you think would provide reasonable benchmark for estimating the price of a future project (or simply projects that you want to compare).
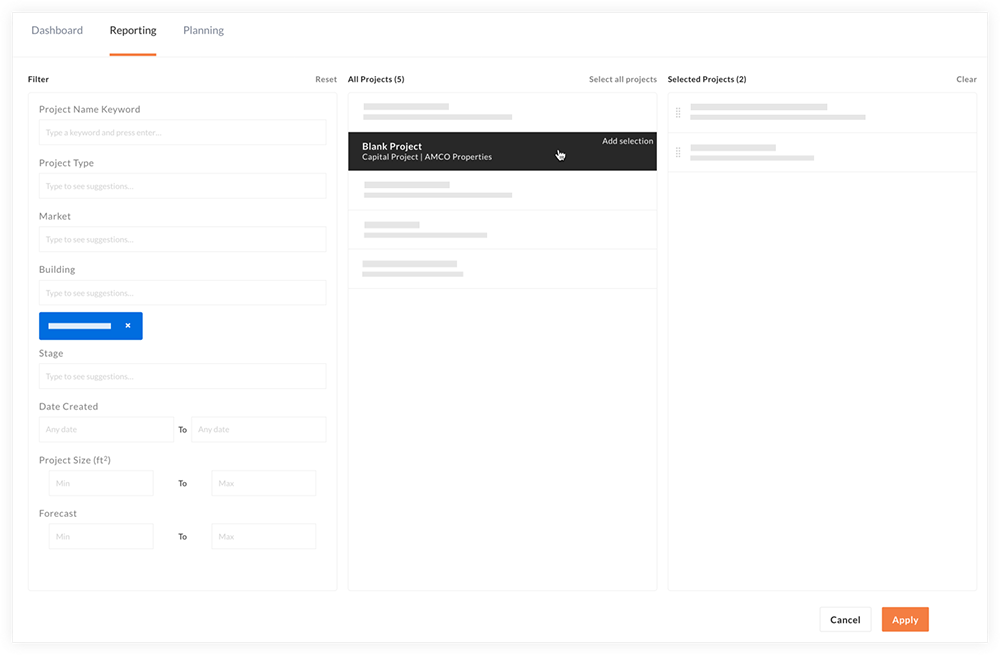
Note: You can reorder the selected projects or click Remove to remove one if necessary.
- After selecting your projects, click Apply.
Your selected projects are shown in the comparison view so that you can compare costs per square foot at the Project level, Cost Item level and Bill of Quantities level. - Optional: The following actions are also available:
To merge rows in the project comparison:
Note: See Merge Rows for a Project Comparison in Portfolio Financials and Capital Planning for more detail.
- Click the Tools drop-down menu and select Merge.
- In the 'Select Rows to Merge' column, mark the tickboxes next to the rows you want to combine.
- Optional: You can enter new names for the merged rows and see those merged rows as a single line item to compare across your cluster of projects.
- Click Merge.
To save the project comparison:
- Click the vertical ellipsis
 icon and select Save.
To export the project comparison:
- Click the Tools drop-down menu and select Export XLS.
To change your project selection:
- Click Edit Project Selection.
- Select the projects you want to compare.
- Click Apply.
To start a new project comparison:
- Click the vertical ellipsis icon and select Start New.
- Click Continue to confirm that you want to start a new comparison.