Import Field Options for the Document Management Tool
Objective
To import custom fields to use for documents in the Document Management tool.
Background
If you want to add a large number of field options for a Document Management field, you can download a CSV file template and import the options.
Things to Consider
- Required User Permissions:
- 'Admin' level permission to the Company level Admin tool.
Note: Users with 'Admin' level permissions to Document Management tool can show or hide default field options for a specific project on the Configure Settings page. See Configure Settings: Document Management.
- 'Admin' level permission to the Company level Admin tool.
Prerequisites
- You can only import fields after all fields have been removed. See the Delete Field Options section below.
Steps
- Navigate to the Company level Admin tool.
- On the sidebar, scroll down to 'Tool Settings' and click Document Management.

- Click the Default Fields tab.
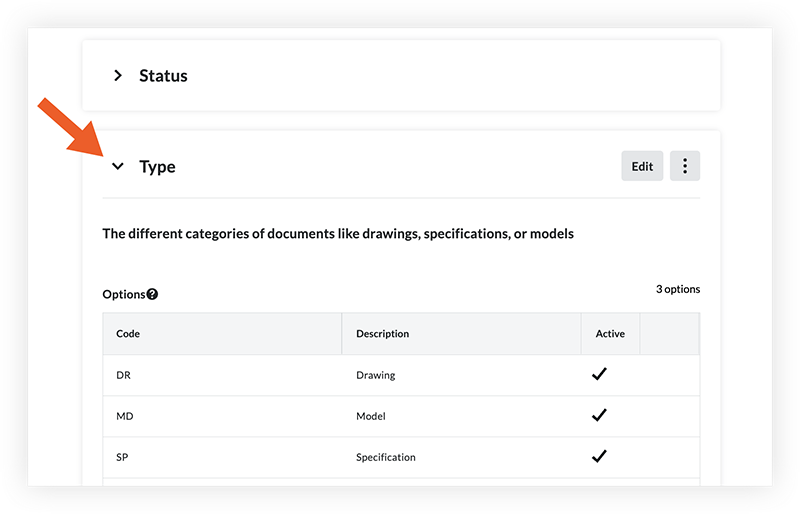
- Click the arrow
 icon next to the field (Classification, Discipline, Status, Type, Volume / System) that you want to manage options for.
- Follow the steps below:
Step 1: Delete Existing Field Options
Note: After you delete field options, you won't be able to use them on any projects. However, these options will not be deleted from any current documents that use them.
- Click the vertical ellipsis
 icon for the field and select Delete All.
 - Click Delete Options to confirm the deletion.
If the changes do not show in the table after a few moments, refresh the page and return to the table.
Step 2: Download and Fill In The Template
- Click the vertical ellipsis icon for the field and select Download Template.
A CSV file will download to your computer. - Open the CSV file and fill in the field options under the provided columns. Do not change the headings of the template or add any additional columns.
- Save your file.
Step 3: Import the Template
- Click the vertical ellipsis icon for the field and select Import Template.
- Select the file that you updated.
- If the template contains one or more options that were previously deleted, you'll see a 'Recover Options' window.
- To recover any options, click Continue.
- To return to your import and create a unique field option, click Cancel.
- To continue with the import without making changes, click Ignore.
- The field options are automatically added. You can make any changes as needed. See Manage Custom and Default Fields and Fieldsets for the Document Management Tool for more information.