Add a Custom Project Region
Objective
To add a new region to your company's Procore account.
Background
If you would like to be able to associate projects with geographic region, you can add a list of regions to Procore's Project Settings page in the Company level Admin tool. You can also customise this list of regions to match your organisation's unique business needs.
Examples
If your company is a US-based organization, you might want to create four (4) regions named:
- Northwest
- Midwest
- South
- West
If your company is a global organization, you might want to create a global list of regions, such as:
- Africa
- East Asia and Pacific
- Europe and Central Asia
- Latin America and the Caribbean
- Middle East and North Africa
- South Asia
Things to Consider
- Required User Permissions:
- 'Admin' level permissions on the Company level Admin tool.
- Additional Information:
- There is no limit to the number of regions you can create.
- You cannot delete a region from this list when it is assigned to one (1) or more projects in your company's Procore account.
- The Steps below allow users to:
- Classify projects into a region when adding a new project or editing an existing one. See Add a New Project or Add or Edit General Project Information.
- Filter the company Portfolio tool by region. See Configure the Filter Projects By Options and Add Filters to the Portfolio Views.
Steps
- Navigate to the Company level Admin tool.
- Under "Project Settings," click Defaults.
- Scroll to the Region Settings area.
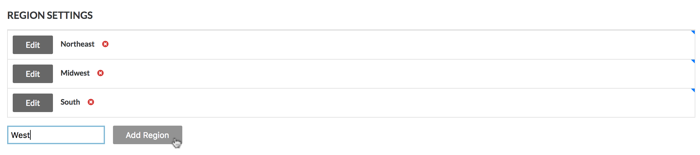
- Do the following:
-
The system adds the new region to the Region Settings list.
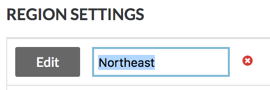
- If you want to modify a region name at a later time, click Edit or double-click the region name. This places the region into edit mode so you can type over the existing entry.
- To delete a region, click the RED 'x' next to the region name.
- Click Save Changes.
Note: The regions you create here will only apply to new projects.