Getting Started Guide: Procore Plugin for Co-ordination Issues
Objective
To learn best practices for getting started using the Procore plugin for Coordination Issues.
Background
Coordination issues can be created and managed in the Coordination Issues tool on Procore web, as well as through a Procore plugin that is installed to your Navisworks® application.
Things to Consider
- Required User Permissions:
- See Permissions for Coordination Issues.
- Additional Information:
- See the Using the Procore Plugin section below for the general steps you will need to take when navigating to the Procore plugin to work with co-ordination issues.
- Prior to creating co-ordination issues, make sure to add locations to your project that align with your co-ordination programme.
Steps
Initial Setup
- Add locations to the project using one of the following methods:
- Revit® and the Procore Plugin: Import Locations Using the Procore Plugin for Revit®
- Procore Imports: Import Locations into your Project Level Admin Tool (Procore Imports)
- Add locations manually in Procore: Add Tiered Locations to a Project
- Assign permissions to users in the project. See Manage Project Permissions Templates.
Note: For the Co-ordination Issues tool, we generally recommend assigning 'Standard' permissions for subcontractors and designers and 'Read Only' to site teams such as site managers, foremen and trades. - Download and install the application for the Procore plugin.
- Associate a model with a Procore project.
Using the Procore Plugin
The following steps explain how to set up the Procore plugin so you can begin working with co-ordination issues.
Note: Certain steps can be completed in a different order depending on your workflow.
- Make sure you have downloaded and installed the Procore plugin application and logged in. See Initial Setup above.
- Open the Navisworks® application on your computer.
- Open the associated model you are working with.
Note: The name of the file must match the model that was originally associated to the project. - Make sure the model is associated with a project in Procore. See Associate a Model with a Procore Project.
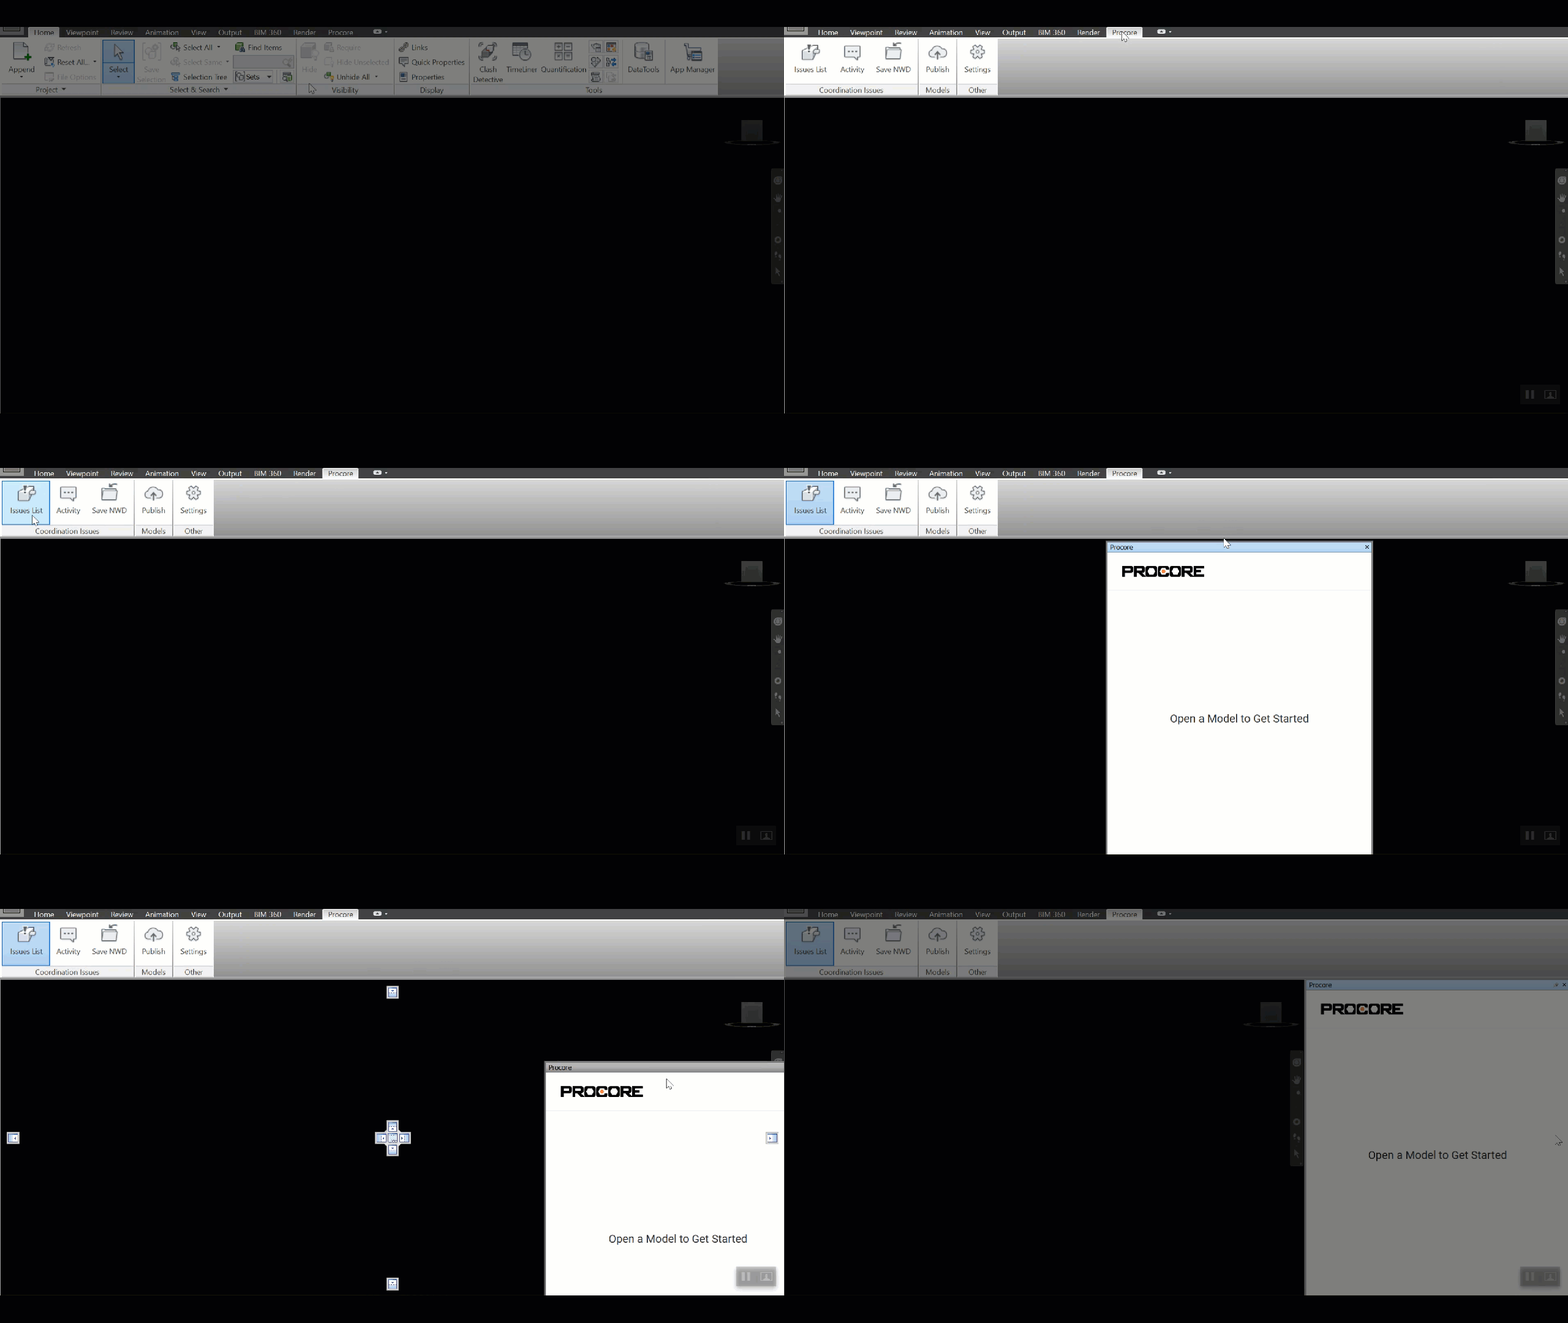
- Click the Procore tab to open the Procore plugin.
- Click Issues List.
- Click and drag the Procore window to an area of the application's screen.
Note: We recommend pinning it to the right-side panel of the application so you can easily view both Procore and your model at the same time.

- Optional: Click the Activity tab to open and arrange the Activity window. See View the Activity Feed of a Co-ordination Issue.

