About Saved Views in the Document Management Tool
Background
Since saved views are created within collections, a collection's filters affect which filters can be chosen for any saved view within it. For example, when building an 'Electrical' saved view within the 'In Review' collection, the collection already filters out all documents except those with the IR-In Review status, so the saved view only needs to add the filter E-Electrical from the discipline drop-down menu. A user cannot add the DR-Draft status because the 'In Review' collection excludes those. In other words, collections and saved views have a parent-child relationship. Saved views (children) adopt the filters of their collection (parent).
Things to Consider
- All saved views must be in a collection:
- All projects automatically include Procore's system-provided collections called 'In Review' and 'Published' that cannot be deleted. However, users can create custom saved views within the provided collections.
- Admins can create collections for everyone on the project.
- The list of collections can be reordered by an admin, but at this time, the list of saved views within a collection cannot be reordered.
- A personal saved view (with 'Me' selected as the access level) can only be seen by the individual who created it.
- A project saved view (with 'Everyone in the Project' as the access level) can't be changed to a personal view later. However, if you have 'Admin' permission to the tool, you can change a personal saved view to a project view later. See Edit a Saved View in the Document Management Tool.
- Some system-provided saved views cannot be edited or deleted. See the 'Things to Consider' section of Create and Edit Collections.
Create and Manage Saved Views
See steps for the following:
Create a Saved View
- Navigate to the project's Document Management tool.
- Make sure you're in the Documents tab.
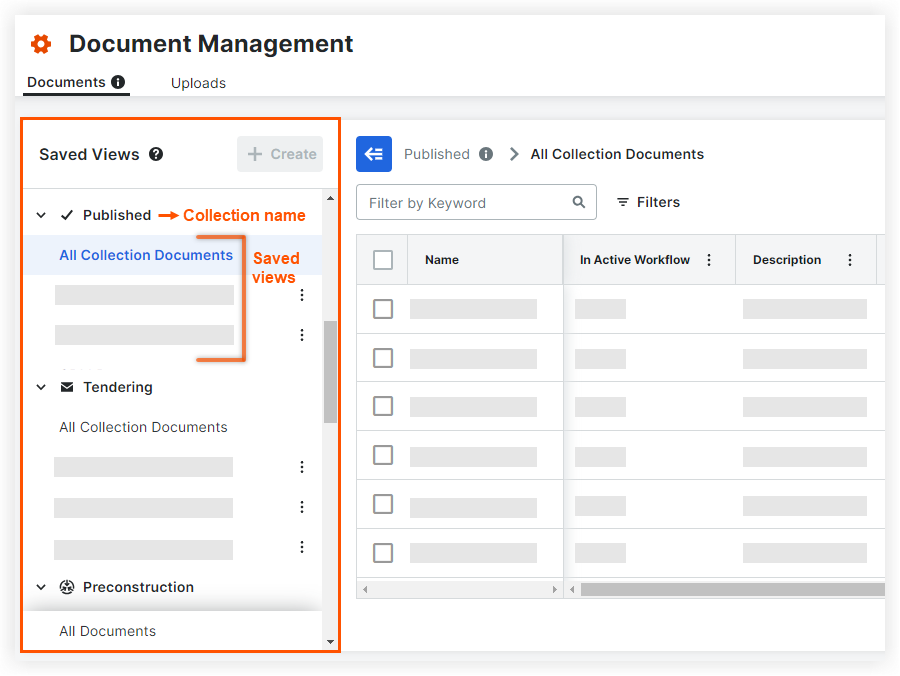
- In the Saved Views panel, click on a saved view listed under a bolded collection name. For example, click on 'All Published Documents' in the collection called 'Published.'
Note: If the Saved View panels is hidden, click the Show Saved Views icon at the top of the table.
Tip: To decide which collection's saved view to choose as a starting point, consider the filters it uses. Learn how to view a collection's filters using the info icon in this collections article.
 - Use the Filters menu to make at least one change to the filters in the current saved view. Consider these tips:
- If you want only the latest revision of each document, click the Latest Revision button. Otherwise choose All Revisions.
- 'Latest Revision' is context dependent. User permissions, the collection's filters and how the revisions are ordered all intelligently affect which revision shows in the saved view.
- If you want to add a filter that includes documents that the collection itself already filtered out, you need to find a more appropriate collection for your desired saved view.
- Find out what a collection's filters are by clicking the info icon.
- Find out what a collection's filters are by clicking the info
- If you want only the latest revision of each document, click the Latest Revision button. Otherwise choose All Revisions.
- Optional: Configure the columns in your new saved view by following the steps in Configure Your View in the Document Management Tool. You can save preferences such as which columns are visible, the order they appear and whether any are pinned to the left or right.
- When you're ready to create the saved view, click Create.
Note: If the Create button is inactive, your filters are outside the parameters of the collection or you have not yet selected filters that are different from the saved view you are in.

- Fill in the following information:
Fields with an asterisk (*) are required.- Name*: Enter a name for the saved view. This name will show in the Saved Views list.
- Description: Enter a description for the saved view.
- View Access: Select an access option for the saved view.
Note: Only users with 'Admin' permissions to the Document Management tool can create views for everyone in the project.- To create a personal saved view that only you can see, select Me.
- To create a saved view that everyone on the project can see, select Everyone in the Project.
- Click Create.
The new saved view is added to the Saved Views panel. Click the name of the saved view at any time to view the filtered list of documents.
Edit a Saved View
Update SAved view Filters
Follow the steps below if you want to make changes to the documents that show in a saved view you created. You can also modify the filters of a saved view an Admin created, but to save your new filters, you must create a new saved view.
- Click the name of the saved view.
- From the More Filters
 menu, add or remove filters to change which documents show in the view.
- After a change is made, an 'Update' button appears next to the name of the saved view and the 'Create' button becomes active in case you want to create a whole new saved view instead.
- If you do not see the 'Update' button, the saved view was not created by you and you cannot edit it.
- See Search for and Filter Documents to learn more about filtering, including where the Latest Revision/All Revision filter is located.
- Click Update next to the name of the saved view. The changes are automatically applied to the saved view.

Edit the Name or Description of a Saved View
Follow the steps below if you want to make changes to the name or description of a saved view. You can also change a saved view to be visible to everyone on the project if you have 'Admin' permissions to the Document Management tool.
- In the 'Saved Views' section, click the vertical ellipsis
 icon next to the saved view you want to edit details for.
Note: You must be the creator of the saved view or an Admin on the project to see this icon and edit a saved view's details. - Click Edit name and description.
This opens the 'Update Saved View' window. - Update the Name and Description fields as necessary.
Note: If you have 'Admin' permissions to the Document Management tool, you can also choose to change your personal saved view to one that everyone on the project can see by selecting 'Everyone in the Project' in the 'View Access' field. However, project views can't be changed back to personal views. - Click Update.

Delete a Saved View
- Navigate to the project's Document Management tool.
- Make sure you're on the Documents tab.
- In the Saved Views panel, find the view that you want to delete.
Note: If the Saved View panels is hidden, click the Show Saved Views icon at the top of the table. - Click the vertical ellipsis icon next to the saved view name and click Delete.
Note: If you do not see this icon, you do not have permission to delete the saved view. See Things to Consider in this tutorial. - To confirm that you want to permanently remove the saved view, click Delete.
The view is removed from the list of saved views.
