About Workflows in the Document Management Tool
Background
If your organisation uses approval processes for document revisions, you can create custom workflow templates in the Workflows tool that can then be assigned to documents that are uploaded to the Document Management tool. Once a workflow has started, workflow participants are notified to review documents, optionally comment on them with markup and provide an approval outcome.
As a document revision gets reviewed and is either approved or rejected, the revision's status is automatically updated in Procore. This means you don't need to manually change permission settings or move revisions between folders or tools after a document is approved. When a workflow is created for a PDF document, workflow assignees can add markups directly to the PDF during their step in the workflow. After the workflow is complete, all workflow decisions, markups and additional file attachments are preserved so that they can be referenced later.
Things to Consider
- Required User Permissions:
- Actions related to workflows within the Document Management tool can require permissions the following areas in Procore (see the Document Management Permissions Matrix and How do permissions work in the Document Management tool?):
- General permissions to the project's Document Management tool.
- General permissions to the Company level Workflows tool.
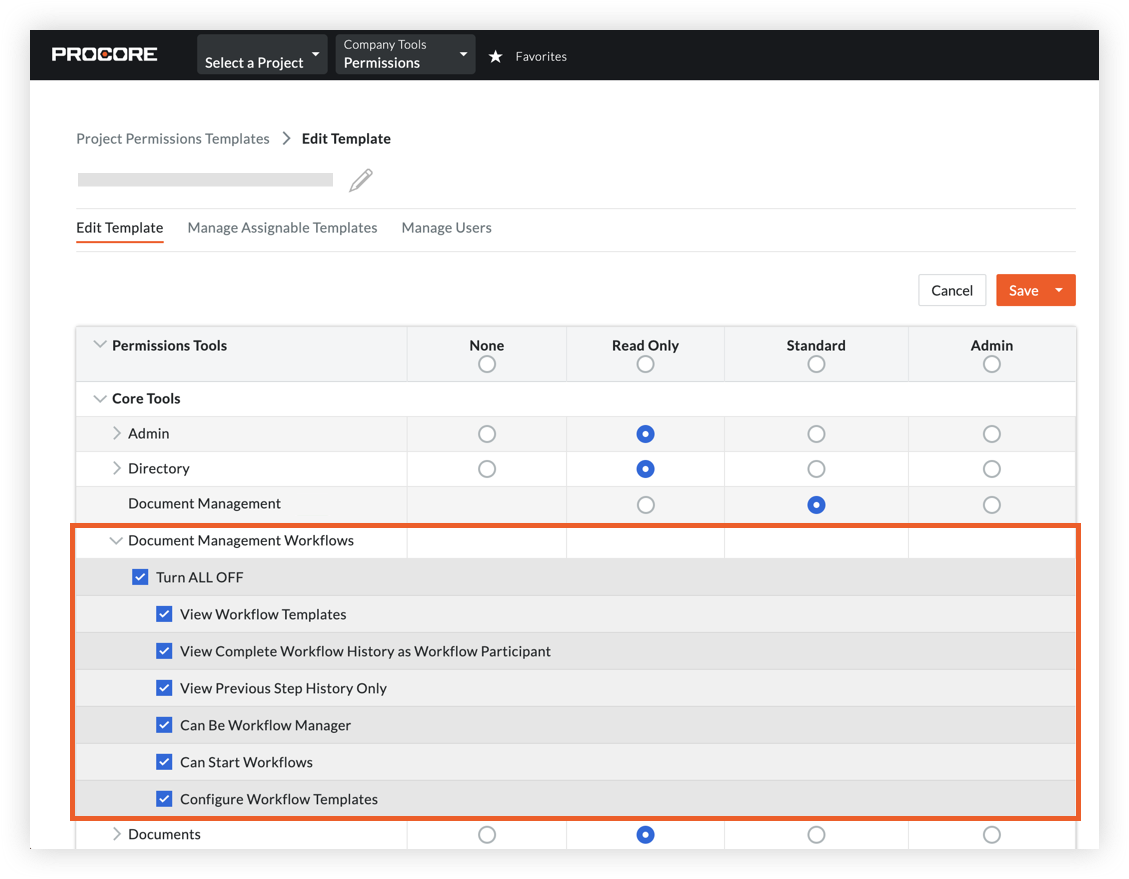
- Granular permissions enabled for 'Document Management Workflows' on a project permission template. See What granular permissions are available for Document Management Workflows?
- Permissions set in the Configure Settings page of the Document Management tool. See Configure Settings: Document Management and View and Manage Workflow Permissions in the Document Management Tool.
- Actions related to workflows within the Document Management tool can require permissions the following areas in Procore (see the Document Management Permissions Matrix and How do permissions work in the Document Management tool?):
- Additional Information:
- Your organisation must have the Company level Workflows tool enabled in Procore. See About the Workflows Beta Program.
- If certain types of document errors arise, Project Admin can resolve them in the 'Action Required' saved view.
Steps
Initial Setup
Follow the steps below when setting up workflows for the Document Management tool. Click to jump to a section:
- Assign Workflow Permissions
- Create a Document Management Workflow Template
- Assign the Workflow to a Project
- Configure a Workflow for the Project
Assign Workflow Permissions
For any users that will be part of an approval workflow, you'll need to assign granular permissions for the Workflows tool in your permission templates.
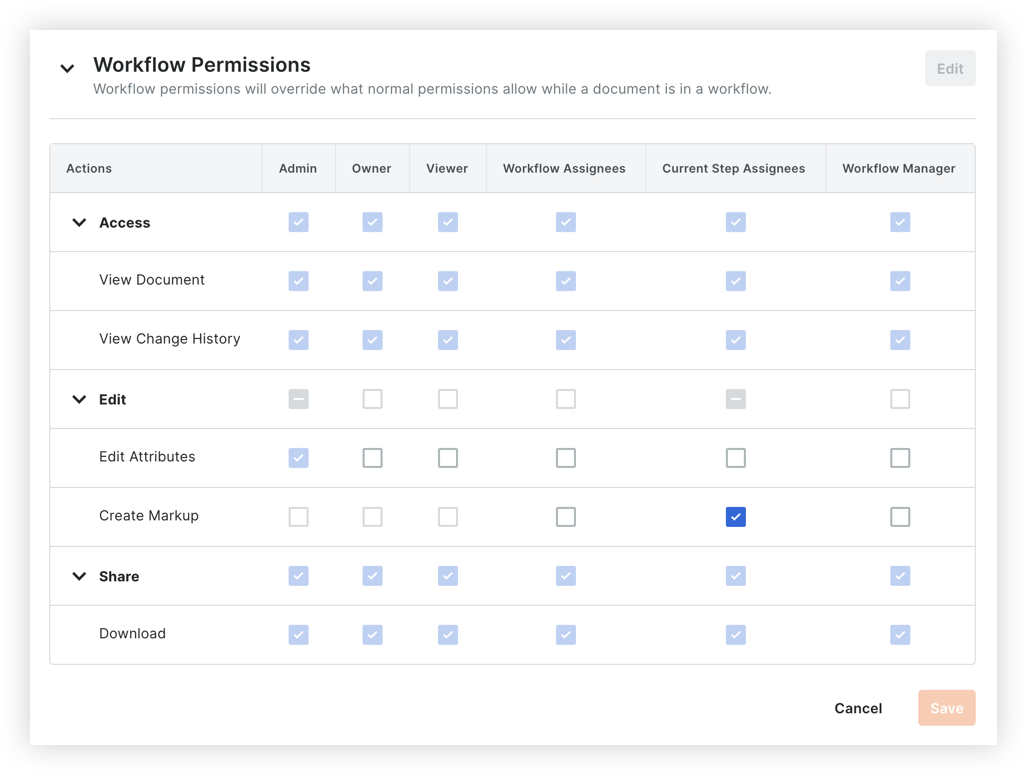
You can also customise the actions reviewers can take on documents within an active workflow, such as who should be able to mark up documents.
Create a Document Management Workflow Template
Note: See Workflows for more resources on the Workflows tool.
- Navigate to the Company level Workflows tool.
- Add a new workflow with the Document Management tool selected.
- Click Create.
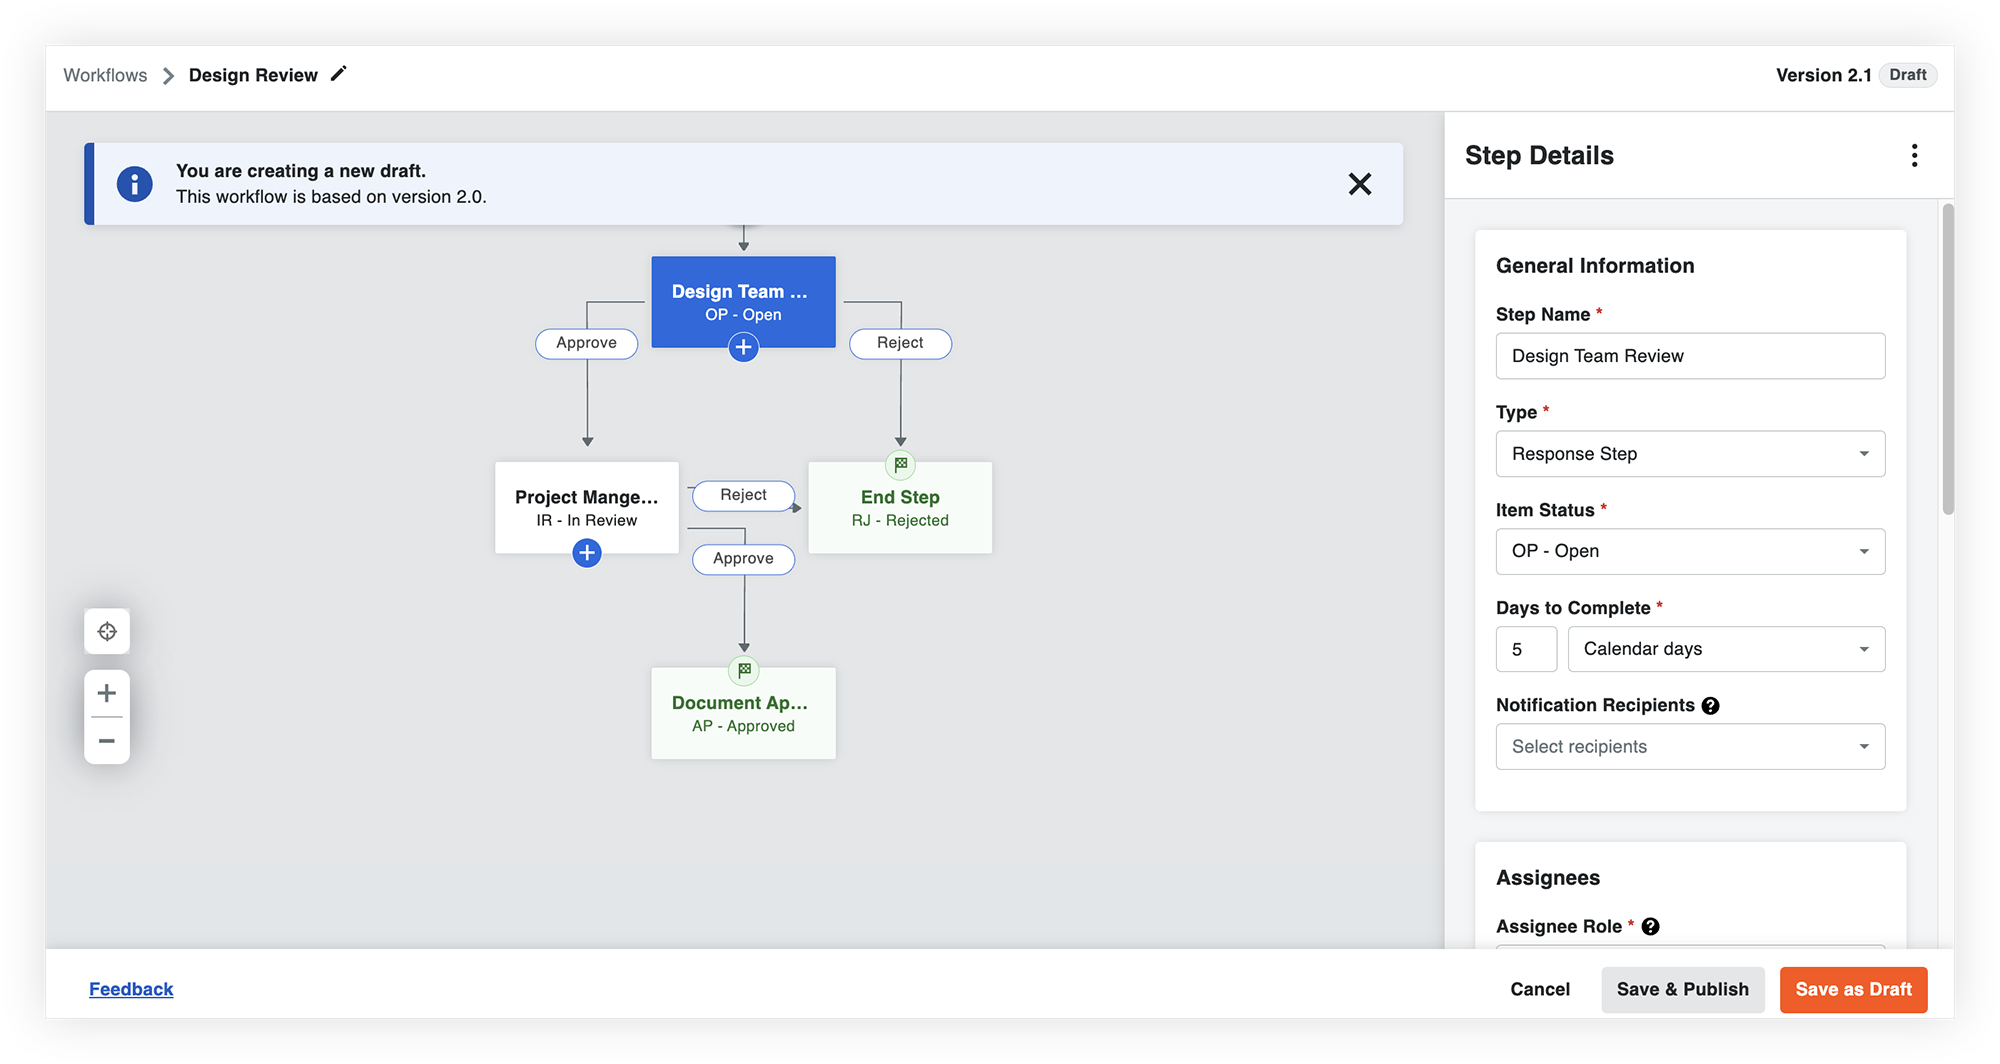
- Build your workflow template. See Create a Custom Workflow Template for detailed steps.
- When you're ready to publish the workflow, click Save & Publish.
Assign the Workflow to a Project
After the Document Management workflow template is created, you'll need to assign it to the projects that you want to use it on. Click the link in the 'Assigned Projects' column to assign it to one or more projects.

Tip
If you assign the workflow to a template project, each time you use that template to create a new project, it will include the workflow's steps and user assignments. However, you can still review and modify the workflow assignments and days to complete as needed for that project.
Configure a Workflow for the Project
Before being able to use workflows in the Document Management tool, you'll need to configure the workflow for the project. If the project was created from a template project with a workflow assigned, it inherits that workflow's user assignments, but it's a good idea to review the assignments. Currently, you can only have one Default workflow set for documents in the project.
- Navigate to the project's Document Management tool.
- Click the Configure Settings
 icon.
icon. - Click the Workflows tab.
- In the 'Document Workflows' section, click Configure on the workflow that you want to configure for the project.
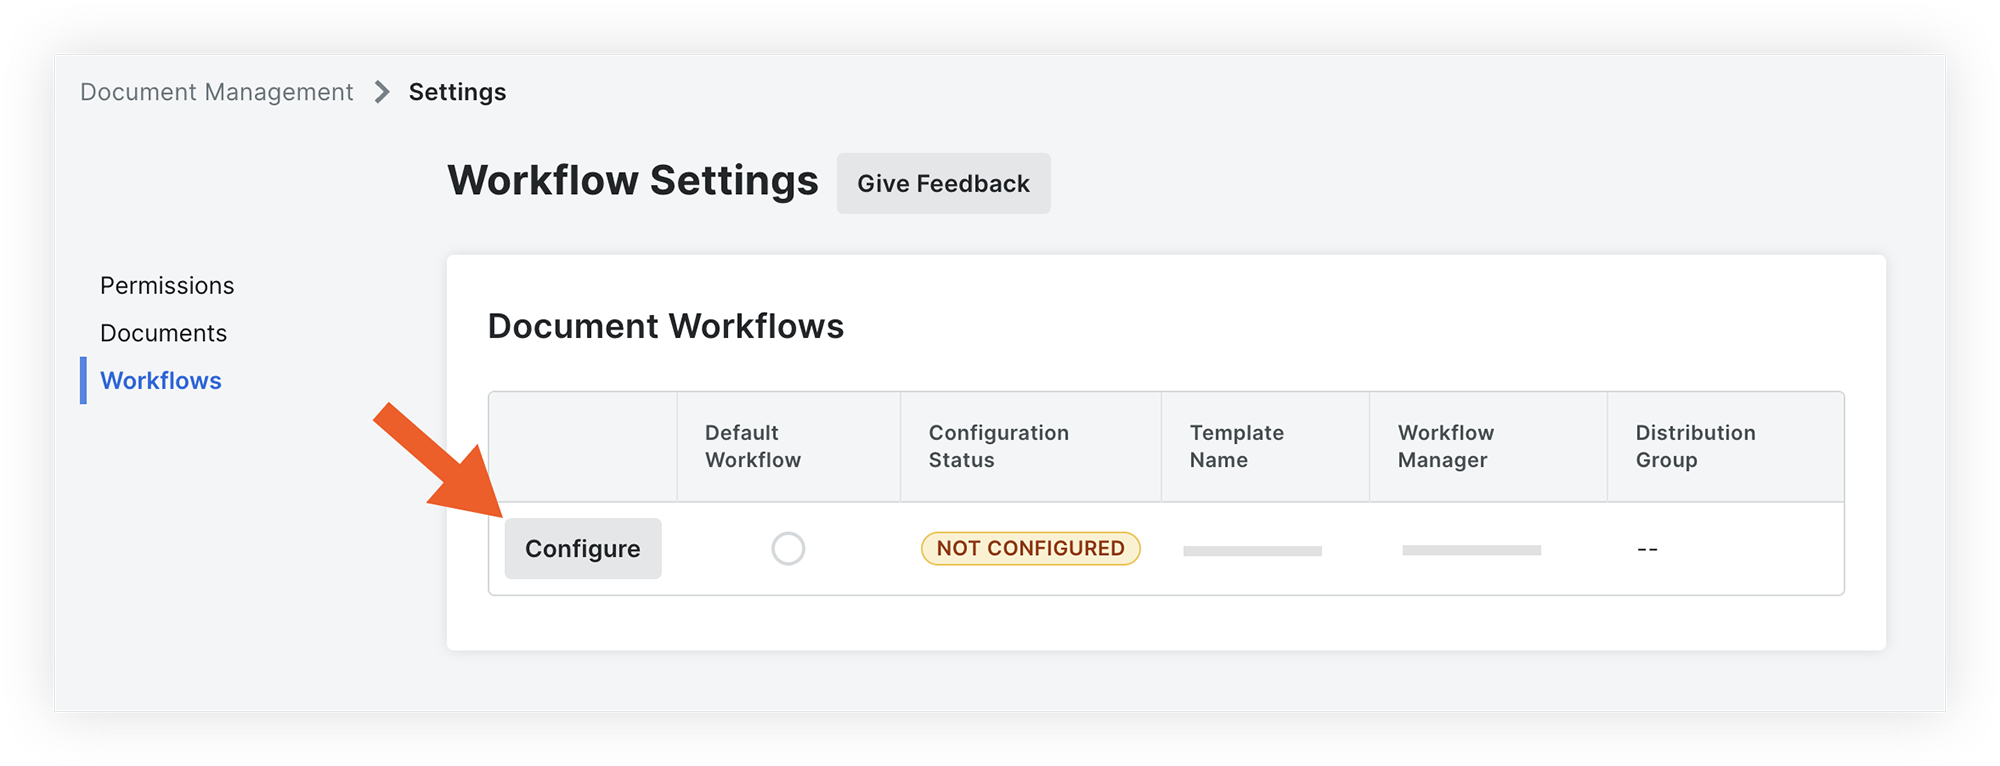
- Configure or review the following required workflow elements:
- Assign Workflow Manager
- Assign Distribution Group
- Assignee(s) and Days to Complete for each step.
edit a Workflow
If you need to modify the workflow template, visit one of these locations:
- Configure Settings: Document Management in the Document Management tool to modify the assignees or workflow manager of future or in-progress workflows.
- Edit a Custom Workflow Template in the Workflows tool to make any modifications to the workflow template.
Using Workflows on Documents
Start a Workflow for Uploaded Documents
Documents that require approval workflows will need a workflow selected in the 'Assigned Workflow' column. The workflows will begin at the first step. See Start a Workflow in the Document Management Tool.
Note: If you bulk submit documents together, reviewers will get a single email with all of the documents requiring their attention, rather than separate emails for individually submitted documents.

Review and Respond to a Document in a Workflow
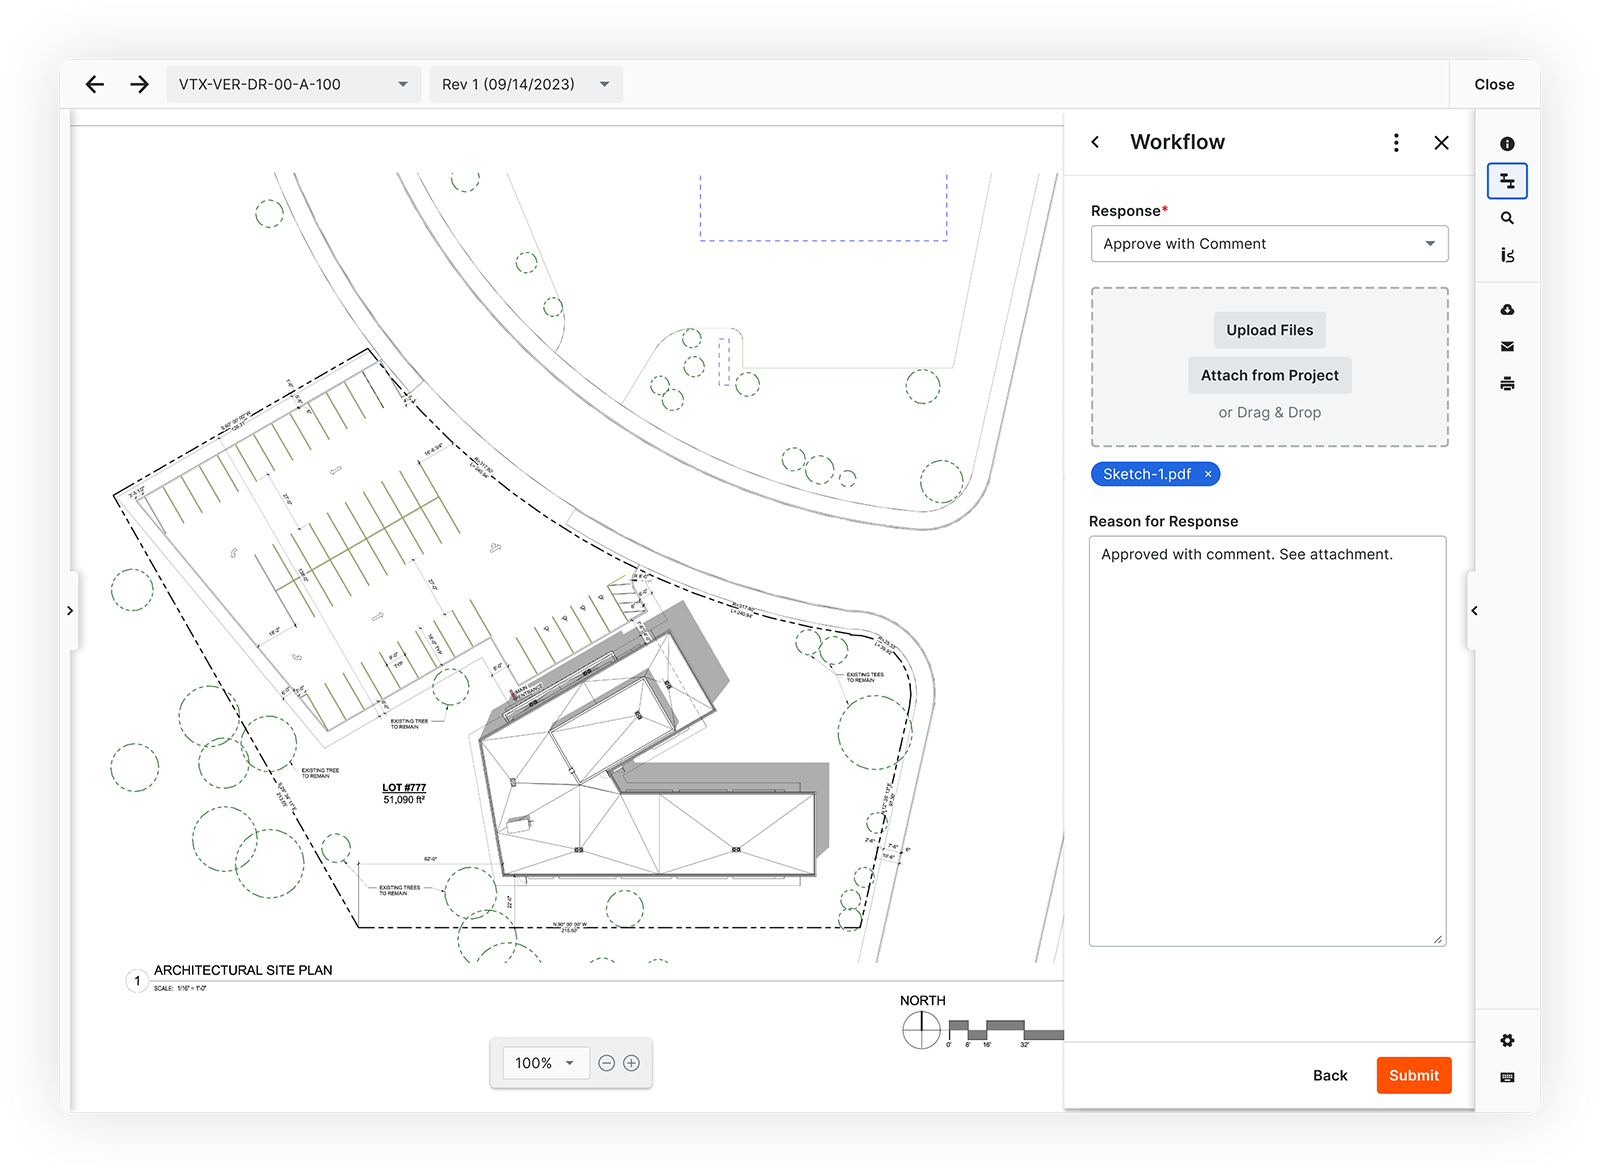
When a workflow for a document starts, a Workflow Assignee can review the document, add markup if necessary and respond in the workflow. Workflow assignees can mark up documents as necessary as part of the response.
DEMO
The image below demonstrates how to access a document that needs to be reviewed.
Note: Instead of clicking the 'In Review' tab, find the document in one of the saved views within the 'In Review' collection in the main 'Documents' tab.

