Review a Document in a Workflow in the Document Management Tool
Objective
To review and respond to a document in a workflow in the Document Management tool.
Background
If you've been assigned to review a document as part of a workflow, you can view the document, access options such as markups and enter your response. See Respond to a Custom Workflow. For more information about workflows in the Document Management tool, see About Workflows in the Document Management Tool.
Things to Consider
- Required User Permissions:
- 'Standard' or 'Admin' level permissions to the Document Management tool.
AND
Added as an Assignee for a step in the workflow. See How do permissions work in the Document Management tool?
- 'Standard' or 'Admin' level permissions to the Document Management tool.
- Additional Information:
- All users with permission to view a document can view that document, whether it has a workflow associated with it or not. However, only people who have been assigned to a step in the workflow will see the Workflow panel.
Video
Steps
Tip
You can quickly access the document from the 'Action Required' email sent from Procore.
Note: You'll need to log in to Procore if you're not already logged in.
- Navigate to the project's Document Management tool.
- Make sure you are in the Documents tab.
- Click on the saved view called Assigned to Me that is in the 'In Review' collection.
Note: You can also access these documents from other saved views, such as 'All Documents' at the bottom. - Click on the document you want to review.
- In the viewer, click the workflow
 icon.
icon.
This opens a Workflow panel. - Optional: If you want to add markups, use the tools in the markup toolbar. See Add Markups in the Document Management Tool.
- Optional: If you have the 'Can Be Workflow Manager' granular permission, you can click the vertical ellipsis
 icon to access the following actions:
- Manage Assignees: If you need others to review the document during this step in the workflow, you can invite additional assignees. Complete the information to invite additional assignees.
- Restart Workflow: If the workflow needs to be restarted, you can set it back to the beginning. Click Restart to confirm.
Note: This will require all previously completed steps to be repeated and will remove prior comments and attachments. Any assignees added to workflow steps after the item was created will also be removed. The new workflow will use the latest template and configuration.- If you need to apply a different workflow template, see Start a Workflow in the Document Management Tool.
- View Workflow Template: Click to see a diagram of the workflow template. Details are shown in the side panel.
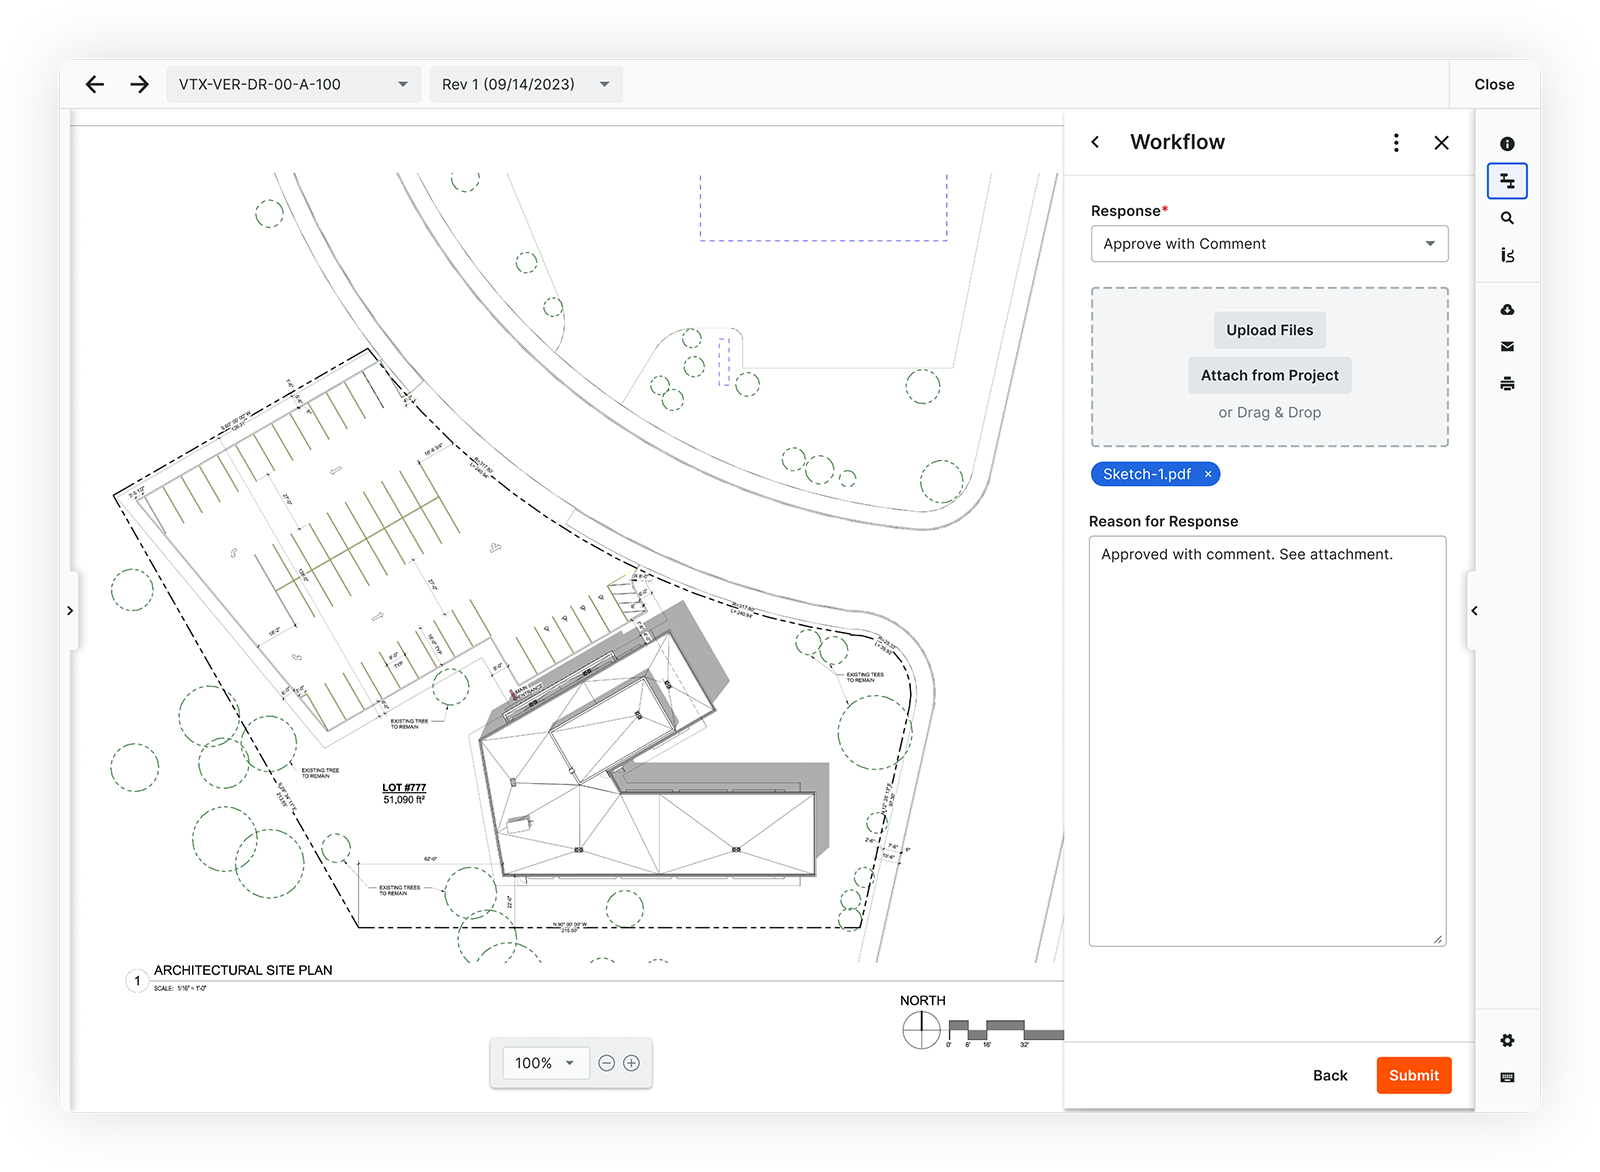
- After you have reviewed the document and are ready to add your response, click Respond.
Note: If you want to submit the same response for multiple documents, refer to the Bulk Respond section. - Enter your response:
- Response: Select a response from the drop-down menu.
- Attachments: If you want to add attachments to your response:
- Click Upload Files or Attach from Project. You can also drag and drop files from your computer to the area.
- Select one or more files and click Attach.
- Reason for Response: If needed, enter comments to explain your response.

- When you're ready to submit your response, click Submit.
Optional: Bulk Respond for Multiple Documents
- From the Documents tab, select the documents that you want to respond to.
Tip: It may be easiest to find the documents by clicking on the saved view called Assigned to Me that is in the 'In Review' collection. - Click the workflow
 icon.
icon. - Enter your response for the documents.
- Response: Select a response from the drop-down menu.
- Attachments: If you want to add attachments to your response:
- Click Upload Files or Attach from Project. You can also drag and drop files from your computer to the area.
- Select one or more files and click Attach.
- Reason for Response: If needed, enter comments to explain your response.
- When you're ready to submit your response, click Submit.
Your response is automatically submitted for all of the selected documents.

