Add the Columns for the 'Budget Changes' Feature to a Budget View
Objective
To add the recommended columns for the 'Budget Changes' feature to a Procore budget view.
Background
Procore's 'Budget Changes' functionality provides project managers with greater control and insight into changes that impact your budget. Whether it's an increase, decrease or net zero (0) budget change, this feature eliminates the need to create a separate budget line item in Procore. It also allows you to reflect the true cost and revenue of your change on a project's budget.
Things to Consider
- Required User Permissions:
- 'Admin' level permissions on the Company level Admin tool.
- Additional Information:
- To learn more about budget changes in Procore, see Create Budget Changes.
Prerequisites
- Add the Budget and Change Events tool to the project. See Add and Remove Project Tools.
- Configure the 'Budget ROM' column settings in the Change Events tool. See Configure Settings: Change Events.
Steps
- Step 1: Add or Modify a Budget View
- Step 2: Add the Source Columns for the Budget Changes Feature
- Step 3: Modify the Calculated Columns for the Budget Changes Feature
- Step 4: Preview the Budget View
- Step 5: Assign the Budget View to Your Projects
Step 1: Add or Modify a Budget View
Example
For the next steps, we created a new budget view based on the Procore Standard Budget view, which is at the top of the list under 'Standard Views'.
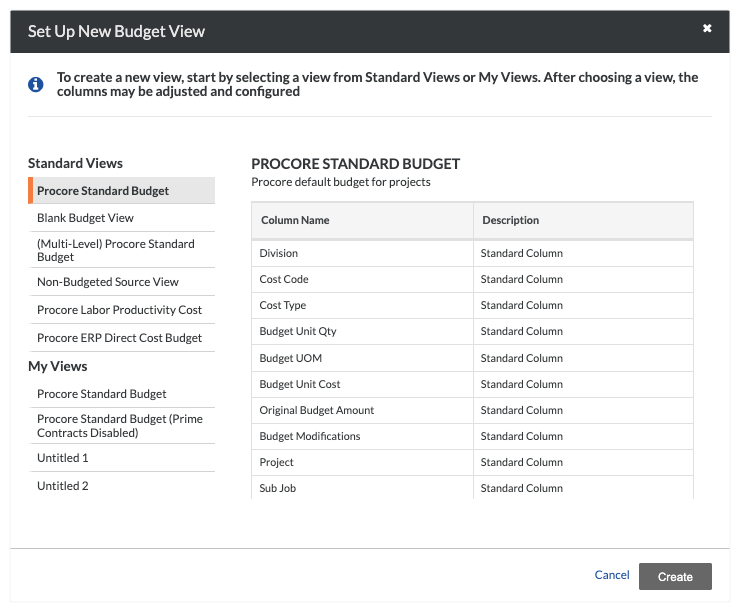
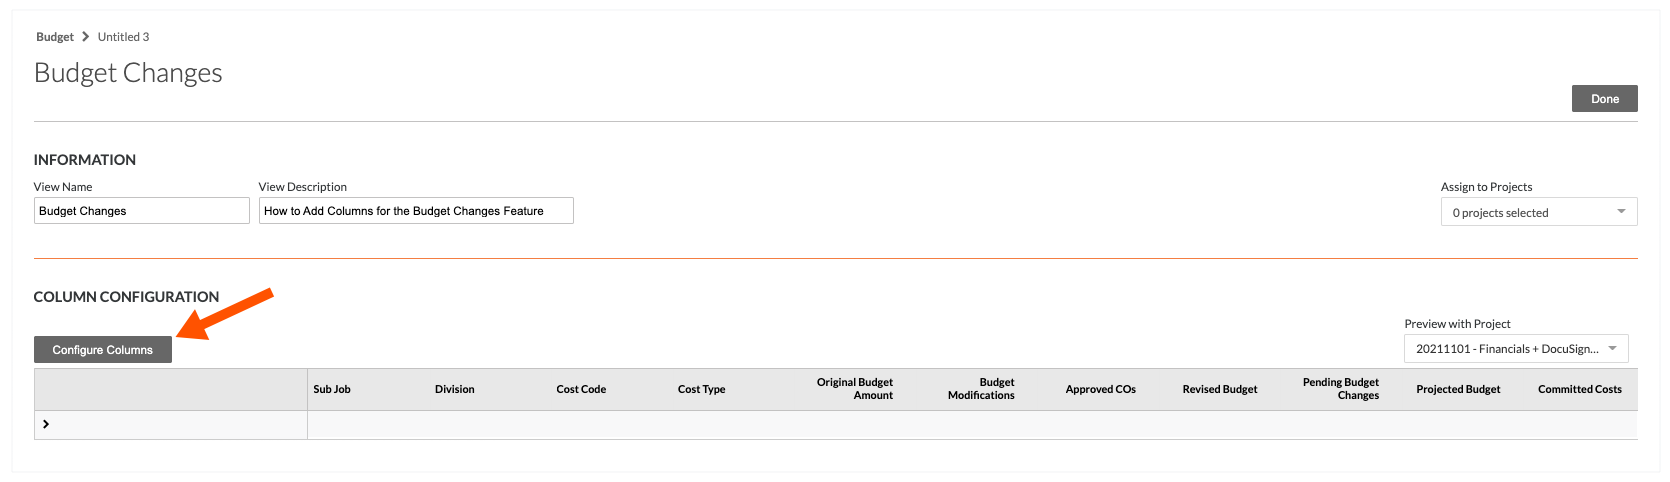
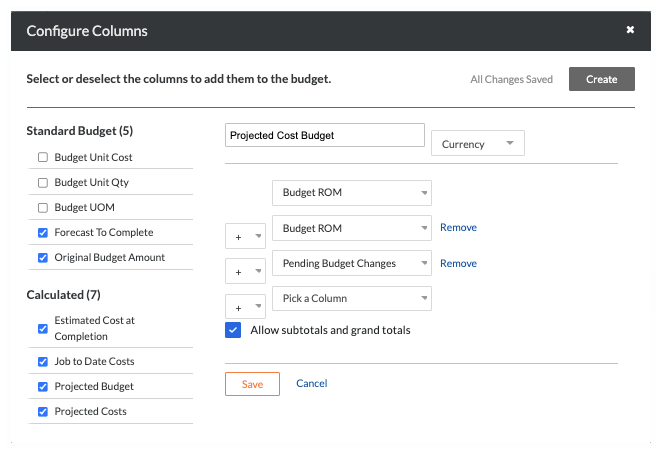
We also named our new view 'Budget Changes'. However, you can name your budget view as you want. When you are ready to continue, click the Configure Columns button. Then proceed by adding the recommended source and calculated columns.
Step 2: Add the Source Columns for the Budget Changes Feature
You will begin by adding the recommended source columns as follows:
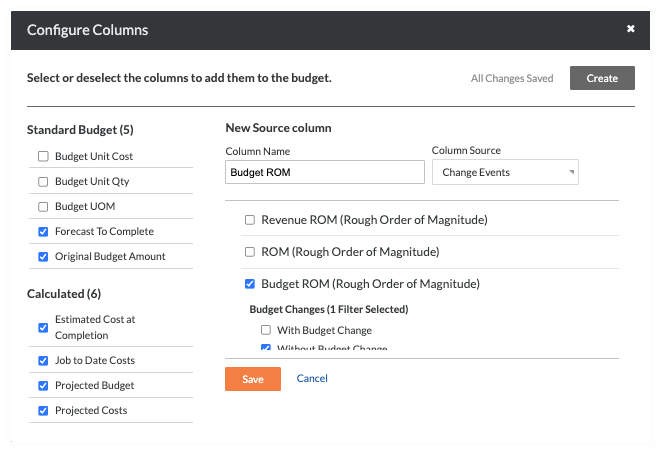
Add the 'Budget ROM' Source Column
In the 'Configure Columns' window, follow these steps to add a new source column named 'Budget ROM'. This column allows your team to forecast the potential impact that a change may have on your budget. Depending on the 'Budget ROM' settings in the Configure Settings page of the Change Events tool, you can configure this column to reflect the Rough Order of Magnitude value in your budget as Cost or Revenue. To learn more, see Configure Settings: Change Events and What is the 'Budget ROM' column in Procore's Budget tool?
| Steps from the Configure Columns window in the Company Admin tool… | Settings |
|---|---|
|
 |
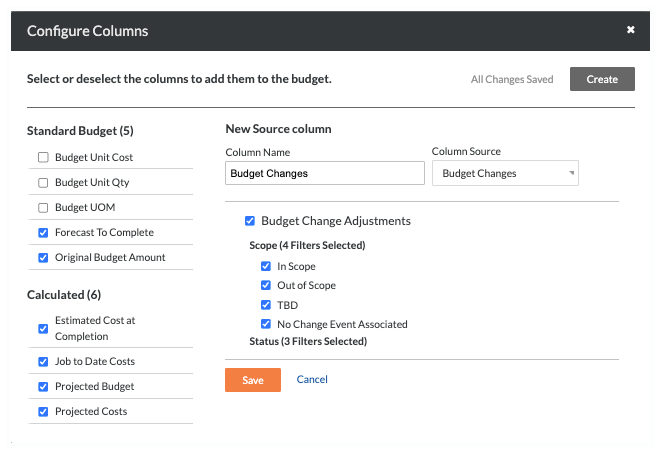
Add the 'Budget Changes' Source Column
In the 'Configure Columns' window, follow these steps to add a new source column named 'Budget Changes'.
| Steps from the Configure Columns window in the Company Admin tool… | Settings |
|---|---|
|
 |
Step 3: Modify the Calculated Columns for the Budget Changes Feature
Next, you will modify the existing calculated columns (or add new ones) to include the new source columns in the calculated columns formulas.
- Add or Modify the 'Revised Budget' Calculated Column
- Add the 'Projected Cost Budget' Calculated Column
Add or Modify the 'Revised Budget' Calculated Column
In the 'Configure Columns' window, follow these steps to modify the existing 'Revised Budget' column for the budget changes feature. Adding this column allows your project team to see the impact of the change on your budget.
| Steps from the Configure Columns window in the Company Admin tool… | Settings |
|---|---|
|
 |
Add the 'Projected Cost Budget' Calculated Column
In the 'Configure Columns' window, follow these steps to add a calculated column named 'Project Cost Budget'. Adding this column allows you to include budget changes so your team can track the projected cost to completion on the project's Budget tool.
| Steps from the Configure Columns window in the Company Admin tool… | Settings |
|---|---|
|
 |
Step 4: Preview the Budget View
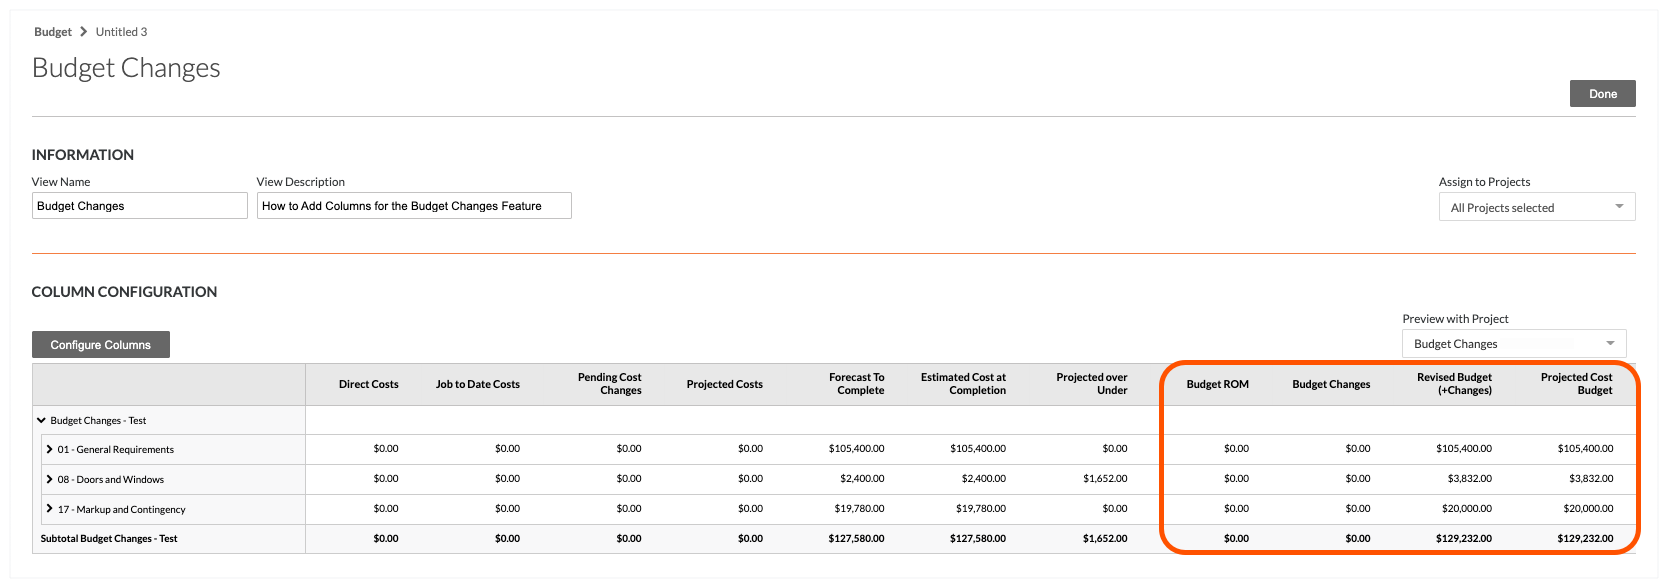
Next, you can preview your new columns in the 'Column Configuration' area and by selecting different projects in the 'Preview with Project' drop-down list. The new columns appear on the right side of the budget. Finally, you can assign the budget view to one or more Procore projects in your company's account using the options in the 'Assign to Projects' drop-down list.
Example
Below is an example of the new columns that you can add to a Procore budget view, after it has been assigned to a project.
Step 5: Assign the Budget View to Your Projects
When you are ready to proceed, assign the budget view to one, multiple or all projects. Simply select the options in the 'Assign to Projects list.
